

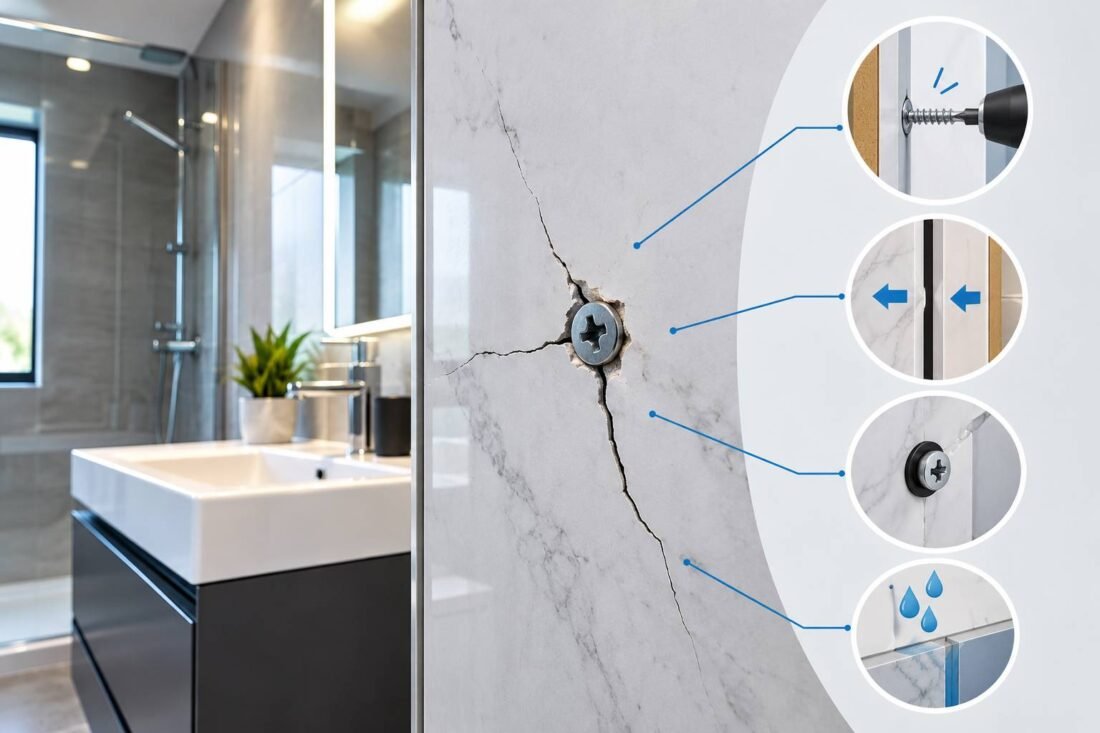
A hairline crack that starts at a screw hole and creeps outwards is one of the most common faults on bathroom wall panels. It usually looks minor, but it lets steam and splashes behind the panel, and the crack tends to grow with every temperature change. The good news is that the cause is almost always something you can identify, and in many cases prevent next time.
Below you will find the main reasons panels crack around fixings, how the cause differs between panel materials, what you can realistically repair and when it is better to replace the panel.
Where screws and fixings are used on bathroom panels
Many modern shower and wall panels are bonded to the wall with adhesive and sealed at the joints, so there are no screws through the main face at all. Fixings tend to appear in a few specific places: where the panel is attached to timber battens or a stud frame, where a shower rail, soap dish or grab rail is mounted, around mixer and valve cut-outs, and where trims or end caps are secured.
That matters because the cracks you see are usually at points where something has been forced through a rigid sheet. A flat panel is strong across its surface, but a drilled hole removes material and creates a stress point, and any extra pressure from a screw head concentrates there.
The most common causes of cracking near a fixing
Overtightening the screw
This is the leading cause. A screw head pulled down hard compresses the panel against the wall, and rigid materials such as acrylic, solid PVC and laminate-faced boards have very little give. The crack often appears straight away as a small star or a line running away from the hole, but it can also develop days later once the panel has warmed and cooled a few times.
The screw should hold the panel snugly, not clamp it. If you can see the surface dimpling or whitening around the head, it has been pulled too tight.
No clearance hole, or one that is too small
A screw that goes straight into an undrilled panel acts like a wedge. The material has nowhere to go, so it splits. A clearance hole that is slightly wider than the screw shank lets the panel move around the fixing instead of pressing against it. For most panels, a hole about 1 to 2 mm larger than the screw shank is a sensible starting point, but the manufacturer’s instructions for your particular panel should take priority.
Ignoring thermal movement
Bathroom panels live in a harsh environment. They are warmed by hot showers and cooled again within minutes, and plastics expand and contract more than most building materials. If a panel is fixed tightly with no room to move, the movement has to go somewhere, and it often goes into the weakest point, which is the area around a screw hole. A typical rule of thumb is to leave an expansion gap of a few millimetres at the edges, though the right figure depends on the material and panel length, so check the supplier’s guidance.
Drilling too close to an edge
The nearer a hole is to the edge of a panel, the less material there is to resist stress. Holes placed right at a corner or edge are a frequent crack starter. Many installers keep fixings at least 15 to 20 mm in from the edge, again subject to the manufacturer’s advice.
The wrong drill bit or drilling technique
A bit designed for masonry or one used on hammer action will chip and shock a thin panel. A sharp bit suited to plastic or a brad point bit, run at a low speed with light pressure, gives a much cleaner hole. Pushing hard when the bit breaks through the back can also split the rear face, which sometimes only shows later. Backing the panel with a scrap of timber while drilling helps.
An uneven wall or poorly supported panel
If the wall is not flat, or there are gaps behind the panel, tightening a screw can pull the panel into a hollow and bend it. A flexed panel is under constant stress at the fixing. Fitting a panel over a bowed wall without packing or levelling the surface first is a quiet cause of cracks that appear weeks later.
Cold panels and rough handling
Plastic panels become more brittle when cold. Drilling or fixing in an unheated bathroom during winter, or after the panels have been stored in a cold garage, makes cracking more likely. Letting them acclimatise inside the room for a day or so before fitting can help.
How the cause differs by panel type
Not every panel reacts to a fixing in the same way, which is why a method that works on one product can ruin another. The table below summarises typical behaviour, though individual products vary.
| Panel type | Typical weak point | What helps |
|---|---|---|
| Hollow PVC (cladding style) | Crushed or split around screws, especially if overtightened | Pre-drill, avoid overtightening, use suitable fixings |
| Acrylic or laminate-faced panels | Surface cracks from stress and edge drilling | Oversized clearance holes, sharp bits, slow speed |
| MDF or board-backed panels | Swelling and cracking if moisture gets behind the fixing | Seal every hole and joint properly |
| Solid surface or thick composite | Cracks at sharp internal corners | Rounded cut-outs, correct screw type |
If you are comparing materials before a refit, the Floors To Walls Shower Panels range is a useful place to see the different constructions side by side, along with their fixing and installation notes.
Can you repair a cracked panel?
It depends on how far the crack has spread and where it is. The checklist below helps you decide.
- Hairline crack, short, not through the panel: often repairable. Clean and dry the area, then seal with a good quality sanitary silicone.
- Crack that is growing: drilling a very small stop hole (around 2 to 3 mm) at the far end of the crack can stop it spreading on some rigid materials. Seal afterwards.
- Crack running to an edge or across a joint: repair is rarely lasting, because the panel has lost its integrity at that point.
- Soft, swollen or discoloured area around the crack: water has probably got into the core or the wall. Replace the panel and check what is behind it.
Filling a crack with silicone will make the surface watertight again, but it will not restore strength. If the same fixing is still under stress, the crack will return, so loosen an overtightened screw or refit it correctly first.
How to fix the fixing properly
When the screw itself is the problem, the repair is a reset rather than a patch. Remove the screw and inspect the hole. If the damage is minimal, you can often refit with a washer or a fixing with a larger head to spread the load, using a slightly larger clearance hole and stopping as soon as the screw is snug. If the hole is split or ragged, a different position, ideally a few centimetres away and further from any edge, is better than trying to reuse the damaged spot. The old hole should be sealed with silicone.
For any fixing that must pass through the panel into a wall, such as a shower rail bracket, seal the hole before the screw goes in, not after. A small bead of silicone around the shank keeps water from tracking along the thread into the wall behind.
Should you repair or replace the panel?
Replacement makes sense when the damage has spread beyond one point, or when moisture has reached the core or the wall. A single small crack at one bracket is often repairable, but several cracks across the same panel usually indicate a wider problem such as a bowed wall or fitting without expansion gaps, and fixing one spot will not solve it.
It is also worth deciding whether the same material is the right choice the second time. Homeowners weighing up a lower-maintenance replacement sometimes look at PVC options, and this overview of a PVC Shower Panel for Cardiff explains how that material performs in wet rooms. Whatever you choose, follow the manufacturer’s installation guide for fixings, spacing and adhesive, because those instructions are written around the way the product actually behaves.
How to avoid cracking on the next installation
- Let panels acclimatise in the bathroom before cutting or drilling.
- Check the wall is flat and dry, and pack out any hollows.
- Mark fixing positions away from edges and corners.
- Drill clearance holes slightly larger than the screw shank, using a sharp bit at low speed.
- Tighten screws until they are snug only, then stop.
- Leave expansion gaps at edges and seal them with sanitary silicone.
- Seal every penetration before fitting a bracket or accessory.
These steps take a few extra minutes, and they make the biggest difference to whether a panel is still crack-free in a year.
A practical next step
If you have a crack at a fixing right now, look at the screw first. Loosen it slightly and see whether the crack closes or relaxes. If it does, overtightening was the cause, and a cleaned, resealed and correctly fitted screw may be all you need. If the panel feels soft, looks swollen or the crack has spread, take it off and check the wall behind before fitting anything new.